


Plan your home before changing it
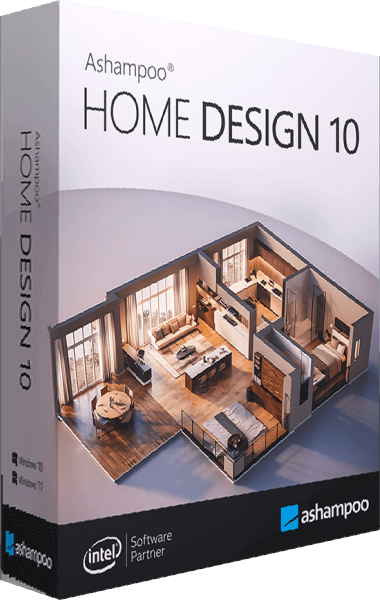
Ashampoo Home Design 10 combines floor-plan drawing, interior design, and 3D visualization in one workspace. Use it to explore a room makeover, plan furniture placement, or develop an idea for a larger renovation. A digital layout gives you something concrete to review before you start moving furniture or choosing finishes.
Begin with the space you already have, then work through possible changes. You might compare two arrangements for a living room, see how a dining table fits beside a doorway, or explore a different use for a spare room. The plan and 3D preview help you discuss these ideas with the other people who will use the space.
Build a floor plan around real dimensions
Place walls, doors, and windows to establish the shape of your rooms. Adjust dimensions as the layout develops, paying attention to openings and the connections between spaces. Working room by room makes it easier to understand proportions before adding the details of an interior.
For a renovation, start by recording the existing layout as accurately as possible. Then use the design to explore alternatives: a different furniture arrangement, a more open seating area, or a new position for storage. Review circulation as well as appearance, including the routes between doors, windows, and the places where people sit or work.
Automatic length, angle, area, and volume calculations support this process. They let you inspect the geometry of your design without repeating every calculation by hand. Keep the input dimensions consistent with your measurements, since the usefulness of the model depends on the information you enter.
Furnish interiors and explore outdoor spaces
The object library provides furniture, decorations, and plants for developing a layout beyond its bare walls. Place the larger pieces first, then add smaller objects as the arrangement becomes clearer. This makes it easier to judge how much room remains for everyday movement and how different pieces work together.
Try a sofa facing a different direction, move a desk closer to a window, or compare several positions for a dining area. Outdoor planning follows the same practical approach: use objects and plants to explore how a seating area or garden arrangement relates to the home. Review the overall space before committing to individual decorative details.
Compatible SketchUp and Collada models expand your object choices. Imported models can help represent a particular style or item more closely than a generic object. Check their dimensions before placing them, especially when comparing furniture that must fit a limited space.
Review layouts through a virtual 3D walkthrough
A floor plan explains the arrangement, while a 3D view helps you understand how the space may feel. Move through the building virtually and examine the design from several viewpoints. Look at a room from its entrance, from a seating position, and from the areas where you expect to spend the most time.
Light and shadow simulation adds another way to examine the appearance of the project. Compare how furniture, openings, and decorative elements relate to each other in the preview. Use these views to identify details you want to revisit in the plan, then make adjustments and review the result again.
This back-and-forth workflow is useful when a layout looks convincing from above but feels crowded from inside the room. A virtual walkthrough also gives family members a clearer basis for discussing alternatives than dimensions and sketches alone.
Visualize roof-mounted photovoltaic layouts
The photovoltaic assistant helps you select modules and arrange them on a roof. Add the installation to the project to examine its placement alongside the rest of the building. This brings the proposed panel arrangement into the same visual context as your home design.
Use the preview to consider the layout and appearance of the installation. Treat it as a planning illustration: a panel arrangement in the model does not by itself determine energy output or establish whether the roof is suitable for installation.
What's new in Home Design 10?
Version 10 adds further detail to home planning with additional door models, including sliding, folding, and glass doors. These choices help represent the type of opening you want to include rather than relying on one general door style throughout a project.
More than 380 additional symbols cover electrical, gas, water, and security planning. Numeric editing tools for walls, windows, and doors provide another way to refine the elements of your design. Together, these additions help develop a project from a broad layout into a more detailed visual plan.
If you already use Home Design 9, compare these additions with the details you need for your next project. Focus on the tools that support your work, whether you mainly rearrange interiors or build a more extensive home model.
A practical workflow for your next room project
Start with one room and its measured dimensions. Add the walls and openings, then place the essential furniture. Keep the first arrangement simple so you can judge the space before spending time on decorations.
Next, explore alternatives and review them in 3D. Consider the room's purpose: a home office needs a useful working arrangement, a living room needs comfortable seating and clear routes, and a guest room may need to serve more than one role. Use the plan to make those tradeoffs visible.
Finally, revisit measurements and the details that matter most. The ribbon toolbar groups tools by task, helping you move between layout work, furnishing, and visualization. Repeat the review until the design is clear enough to guide your next decisions.
Home Design 10 purchase options
Home Design 10 brings layout planning, furnishing, object imports, and 3D review into a single design workflow. Review the available offer and license terms in the purchase section, then confirm the selected version and final checkout total.