
Search for deleted files with O&O DiskRecovery 14
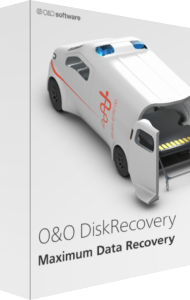
O&O DiskRecovery 14 searches storage for deleted or lost data using complementary recovery methods. A guided workflow takes you through source selection, search settings, result review, and saving selected files.
Start with the location where the loss occurred. A result is a recovery candidate rather than proof that every original byte survived, so verify restored copies before treating the task as complete.
Preserve the source before scanning
Avoid new writes to the affected storage. Do not save recovered files to the source drive, because output can overwrite data you are still trying to retrieve.
Prepare a separate destination with adequate capacity. If the device shows physical failure symptoms, consider specialist recovery before repeated scans rather than assuming software can repair the hardware.
Select a partition or an entire device
The source list includes partitions, whole disks, and connected storage such as USB drives and memory cards. Unallocated areas can also be searched.
Confirm the device identity before starting. Do not format or repartition a source just to make its contents appear in Windows; preserve its current state while investigating the loss.
Choose complementary search methods
The application combines O&O UnErase, O&O FormatRecovery, and O&O DiskRecovery search processes. Search settings include DeepScan, SmartScan, and RawScan options.
Review the settings available for the selected source. SmartScan is partition-specific, while deeper scanning can take longer; choose around the situation rather than assuming every option should always be enabled.
Filter file types and inspect supported previews
File-type selection narrows what is searched, and results let you choose individual files for recovery. Supported picture and text formats can be previewed.
If the file name is unfamiliar or folder information is missing, inspect the available content. A preview is useful for identification, but open the recovered copy in its normal application to check usability.
Use custom signatures for specialized file types
User-defined signatures provide a way to describe file types for the scan. This is an advanced search option rather than a guarantee of successful reconstruction.
Use it when you understand the format you need to locate. Keep the original source unchanged and compare a recovered sample with the content you expect before processing a large collection.
Check edition scope and plan future recovery copies
Review the selected edition for permitted use, especially when recovering data for a company or clients. Admin and Tech licensing should not be assumed to come with every offer.
For prepared system and file backups, see O&O DiskImage 23. Our file-backup guide explains recovery-copy planning. Deleted-file scanning is a different workflow from restoring a verified backup.